1. Windows XP must be Services Pack 3
2.Must be confirm the root certificate of Exchange is present in Windows XP "Trusted root certifictae"
3. Run following in Exchange Powershell wherethe SAN of Exchange 2013 is mail.domain.com
Set-OutlookProvider EXPR -CertPrincipalName:”msstd:mail.domain.com”
Set-OutlookProvider -Identity EXCH -CertPrincipalName msstd:mail.domain.com
IISreset
4. If use wildcard certificate, run
Set-OutlookProvider EXPR -CertPrincipalName:”msstd:*.domain.com”
Set-OutlookProvider -Identity EXCH -CertPrincipalName msstd:*.domain.com
IISreset
Saturday, June 20, 2015
Friday, June 19, 2015
How to add SSL to a Web Application in SharePoint 2013
- On the SharePoint – 80 site→ Edit Bindings

- In the Site Bindings dialogue, click Add → in the Type drop down, select https→ in the SSL Certificate drop down, select your cert.

- It should look like this when you’re done

- Next, on the SharePoint – 80 site, click on SSL settings

- Select the check box for Require SSL

- Launch the CA. Go to Application Management → Alternate Access Mappings → Edit Public URLs
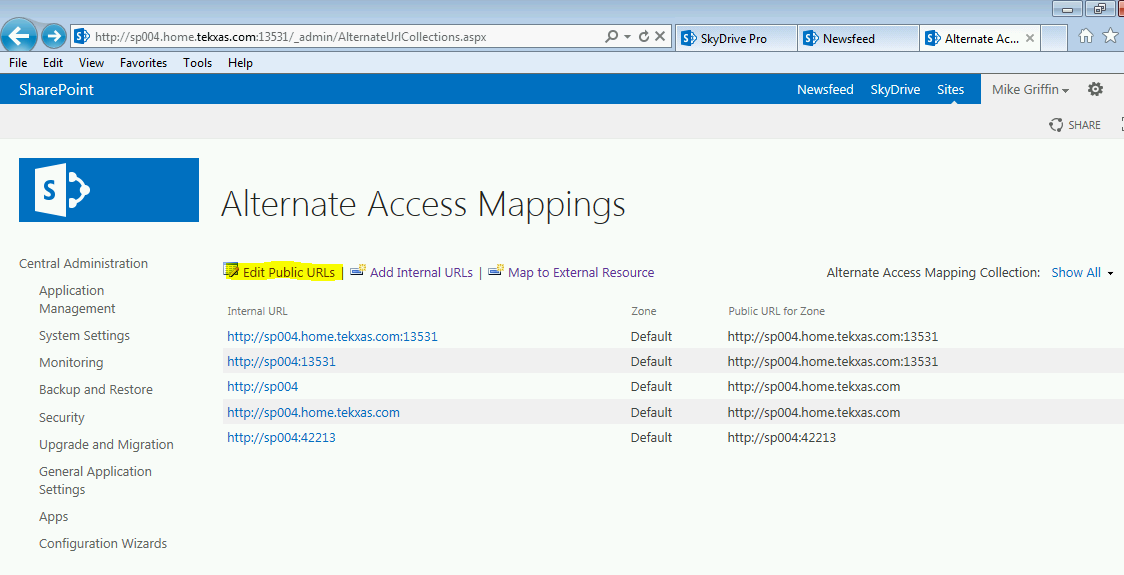
- Under Alternate Access Mapping Collection, select SharePoint – 80.
- Change the Default to to the SSL site URL (e.g., https://servername.abc.com). Make sure intranet, internet, custom and extranet are blank. Click Save.

- Go back to the SharePoint Server and perform an IISReset
- When IIS returns, launch the CA. Remember, after an IISReset SharePoint sites, including the CA, take a minute to launch on the first time in
- When the CA launches, click on General Application Settings → Farm Search Administration→ Search Service Application→ Content Sources →Local SharePoint sites → Under Start Addresses, change http://servername.abc.com to https://servername.home.tekxas.com. Then run a full crawl.
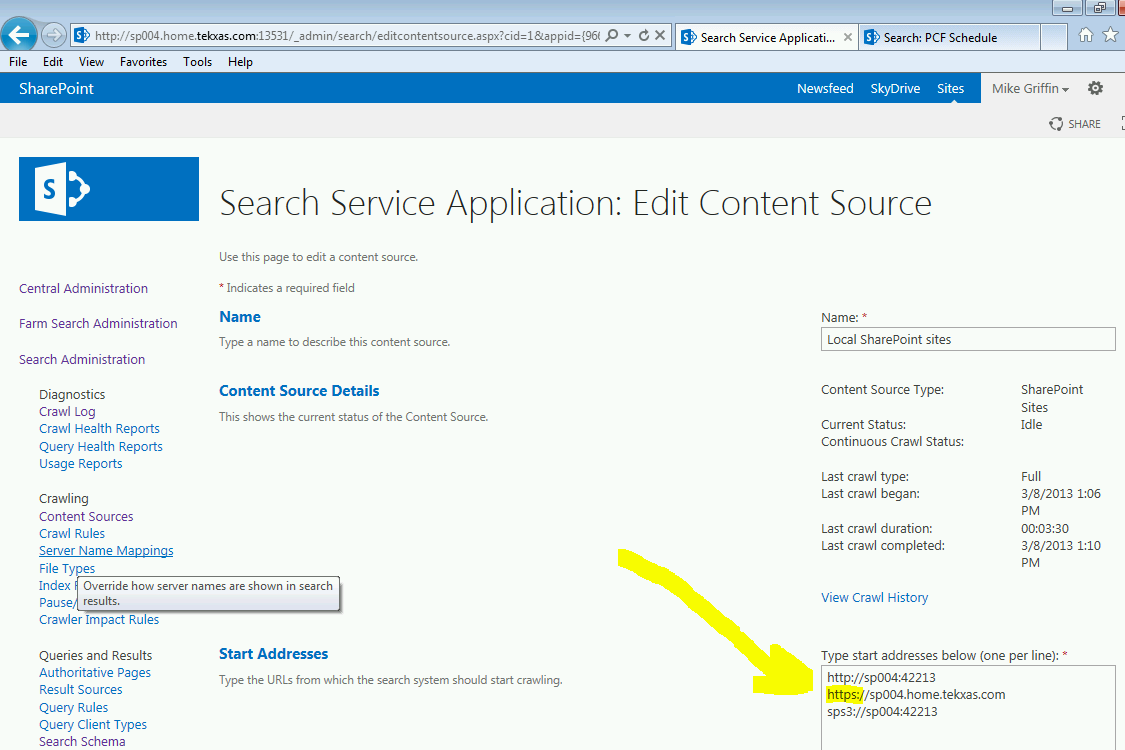
That should do it.
Thursday, June 18, 2015
Configuring the Exchange Server 2013 AutoDiscover Internal URI
1. Use Get-ClientAccessServer to see the existing configuration
In Exchange Powershell
Get-ClientAccessServer | Select Name,AutoDiscoverServiceInternalURI
2. To configure the new internal URI use Set-ClientAccessServer.
In Exchange Powershell
Get-ClientAccessServer | Set-ClientAccessServer -AutoDiscoverServiceInternalUri https://mail.exchange2013demo.com/Autodiscover/Autodiscover.xml
In Exchange Powershell
Get-ClientAccessServer | Select Name,AutoDiscoverServiceInternalURI
2. To configure the new internal URI use Set-ClientAccessServer.
In Exchange Powershell
Get-ClientAccessServer | Set-ClientAccessServer -AutoDiscoverServiceInternalUri https://mail.exchange2013demo.com/Autodiscover/Autodiscover.xml
Subscribe to:
Comments (Atom)
-
Connect to the ESXi host with SSH Stop the USB arbitrator service. This service is used to passthrough USB device from an ESX/ESXi host to...
-
To make changes to this policy for one of the seven default values: Start the Microsoft Management Console. On the Console menu, click Ad...

